
If you are frustrated with this iTunes Error 0xE80000A code While Connecting iPhone X, iPhone XS, iPhone XR, iPhone SE, iPhone 8, iPhone 8 Plus, iPhone 7, iPhone 7 Plus iPhone 6, iPhone 6s, iPhone 5s, and iPad To Windows 10 PC, then here is your best solution. However, you will get the same issue when iTunes fails to connect to your iPhone. The problem may be of any kind: your Windows computer failed to receive contents from the iPhone or refused to play media files. But this error code is very common on Windows computers when you try to connect your iPhone to iTunes. So if your windows 10 computer greeted you ‘iTunes could not connect to this iPhone, an unknown error occurred (error 0xe80000a code) prompt, and left you clueless. Then you need to follow these fixes.
What is iTunes error 0xe80000a
There are various reasons for this iTunes error 0xe80000a in Windows 10 PC. this message comes from such as damaged USB port or cable, incompatible version of iTunes software installed on your computer or Windows system files corrupted missing, and more. But don’t worry iTunes related problems can be easily fixed on your Windows 10 PC. So If you are also struggling with similar problems here we have listed different tips that you can try to instantly fix the unknown connectivity error on your iPhone and Windows computer.
Best Free iTunes Alternative
If you’re sick of using iTunes, try the best free iTunes alternative – DearMob iPhone Manager – to manage your iPhone/iPad/iPod (old or newly released iDevices) more easily and flexibly on your PC/Mac.
You can transfer photos, videos, music, apps, messages, and 15+ files between iPhone/iPad and PC/Mac in bulk or selectively, add/delete/manage music playlists, and create iPhone ringtones from your favorite songs. You can back up all or just some of the data on your iPhone with a single click, and go back to an earlier version whenever you want. No risks of data erasure, no iTunes restrictions.

How to Fix iTunes Error 0xE80000A
you can fix this issue by updating your Windows,iTunes, and iOS to the latest version. or by disabling antivirus software and resetting iTunes software.
Tips: A faulty USB port or cable might be the common reason for the error 0xe80000a. Hence connect your iPhone to another connecting cable with another USB port of your Windows PC.
Airpods Connected But Sound is Not Coming? Fix the Airpods sound here.
How to fix iTunes error 0xe80000a windows 10
1. Update Your Windows PC, iTunes, and iOS to Latest Version
The best way to start fixing this error is to update your software. Because sometimes these types of errors come from software or hardware incompatibility, installing the latest update on your iPhone and windows pc can really get off you from this situation. However, make sure iTunes software on your windows pc is updated.
Firstly you can start updating your Windows PC. To do that you have to go to Computer settings, then search for Update & Security, and then check for updates.

If new updates are available, then update your computer to the latest version of Windows 10. To learn about Windows Update read this Microsoft Article.
Next, you can update your iPhone or iPad device. Open the Settings app on the iOS device and tap General, then tap on Software Update. If an update is available on your iOS Device then click on Download and Install.

You can read about bug fixes and Resolved issues by tapping on Learn More. To read various methods about how to update your Apple iPhone and iPad Device, you can read this Apple Official Update Guide.
The last thing is to update the iTunes app on your Windows Pc. updating the latest version of iTunes on a windows 10 computer requires an Outlook Email ID. first, you have to login into the windows store and then search for iTunes. If an update is available then click and complete the update and restart your computer to check if your errors are fixed or not.

Please also update or restore other Apple Software such as iCloud.
2. Disable Antivirus and Security software on PC
Maybe sometimes the third-party antivirus or Security software can cause the connectivity issue between your iPhone and iTunes software. To check that, you can temporarily pause or uninstall the third-party antivirus and security software on your Windows PC. Once you’ve done that, restart the connection from your computer to your iPhone or iPad by unplugging and replugging the cable. Then, check if the issue is still there.
3. Restart Apple Mobile Device Services
This is another good option. And this method is very helpful in device plugging and unplugging related problems. this effective solution can probably help you to fix the error code 0xe80000a windows 10 computer.
- Press Windows + R Key, type services.msc and click the ok button.
- Scroll down and search for AppleChargerSrv
- Now Right Click Apple Mobile Devices Service and tap on Properties.
- Check if this service is automatic or manual. If the service is manual then change it to Automatic and click on Start.
- After that tap on ok to save it.
4. Reset Location and Privacy Settings
Sometimes location and privacy settings are corrupted on AppleiPhone or iPad. So this is another reason for the iTunes error 0xE80000A to show up. These types of settings on Apple iOS Operating Software carry the trust permissions that were given to your iPhone or iPad when the first time you linked it to your PC. To fix the issue, you need to reset them. For resetting location and privacy settings follow these steps.
Step 1: on your iPhone open the Settings App. now touch on general Menu and next tap on Reset Menu.

Step 2: On the next screen, tap on Location & Privacy. After that, you will get a Reset confirmation. Tap on that and complete the process.
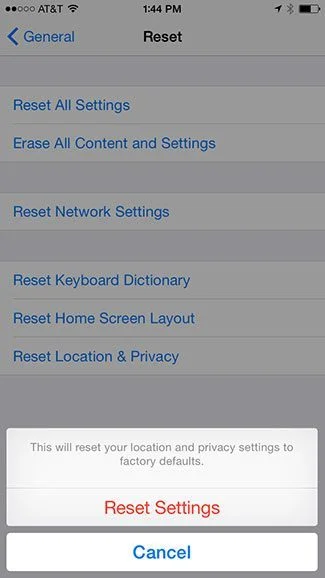
Now you have successfully completed the location and privacy settings reset. then you can try to connect your iPhone to your Windows PC and launch iTunes and then click on trust on the prompt pop-up screen on your iPhone when prompted.
5. Reset Lockdown Folder
This is an exclusive folder created by the iTunes app on Windows 10 PC. The Lockdown folder contains various security certificates that are necessary to make communication with the previously connected Apple iOS devices successfully. Just like the location and privacy settings, you can reset them to solve the error 0xE80000A on iTunes. So now here is the reset process.
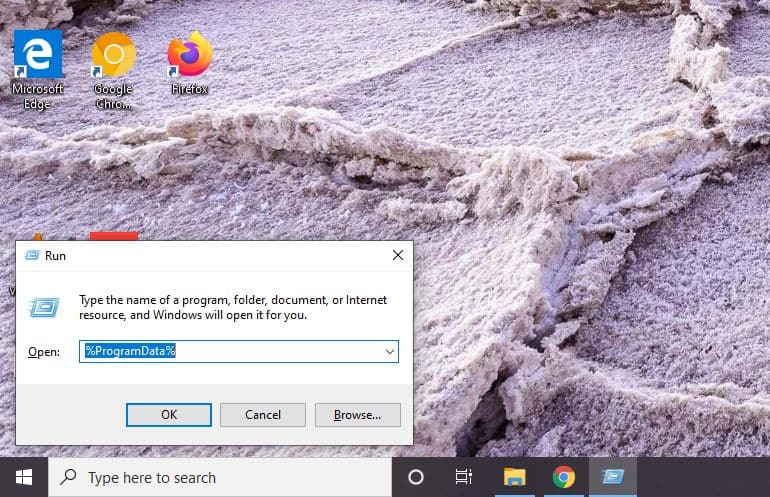
1: Open the Windows Run Box by Pressing Window+R Key. Type %ProgramData% into the Blank box of Run, and then click OK.
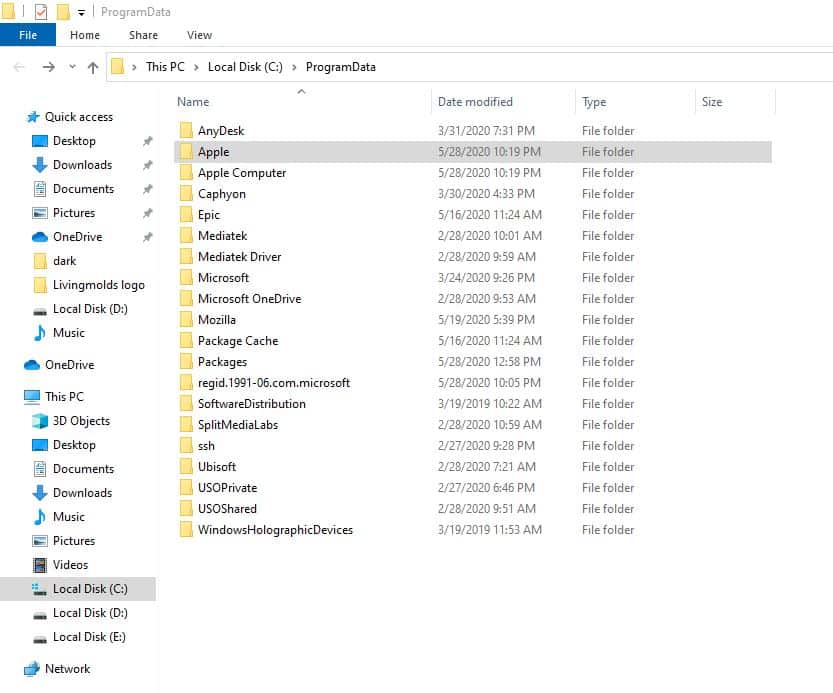
2: On the File Explorer screen that shows up, double-click on the Apple written folder.
3: After opening the Apple directory, right-click the folder labeled Lockdown, and then click left-click and Rename it.
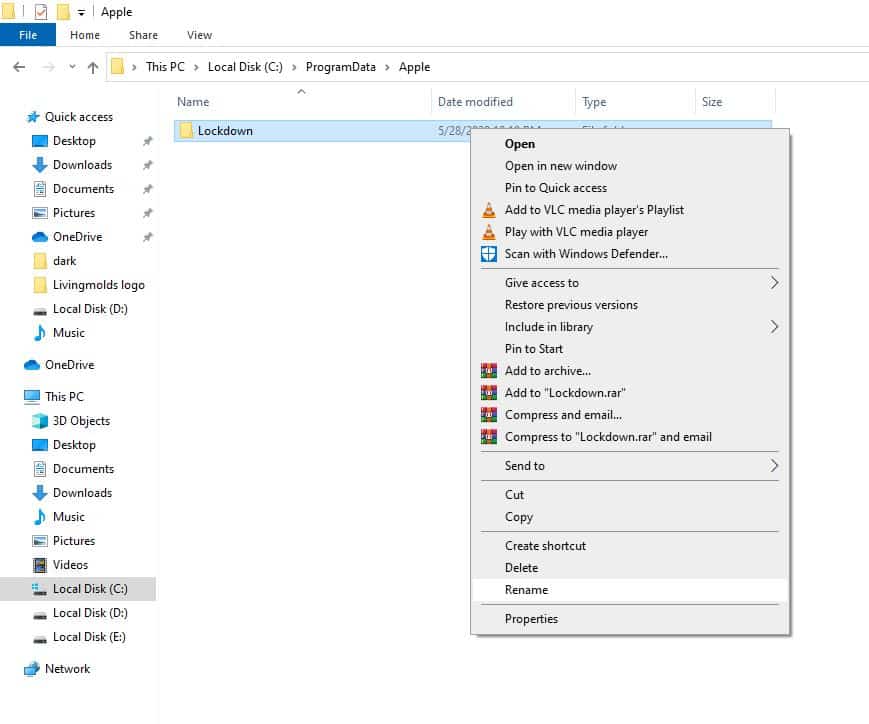
4: Now rename the folder to Lockdown.old.

You can now try to relaunch iTunes Application on a Windows computer and reconnect your iPhone or IPad and then tap Trust when prompted. Now, the lockdown folder will be created automatically from scratch with the security certificate which is required to establish communication successfully between both devices.
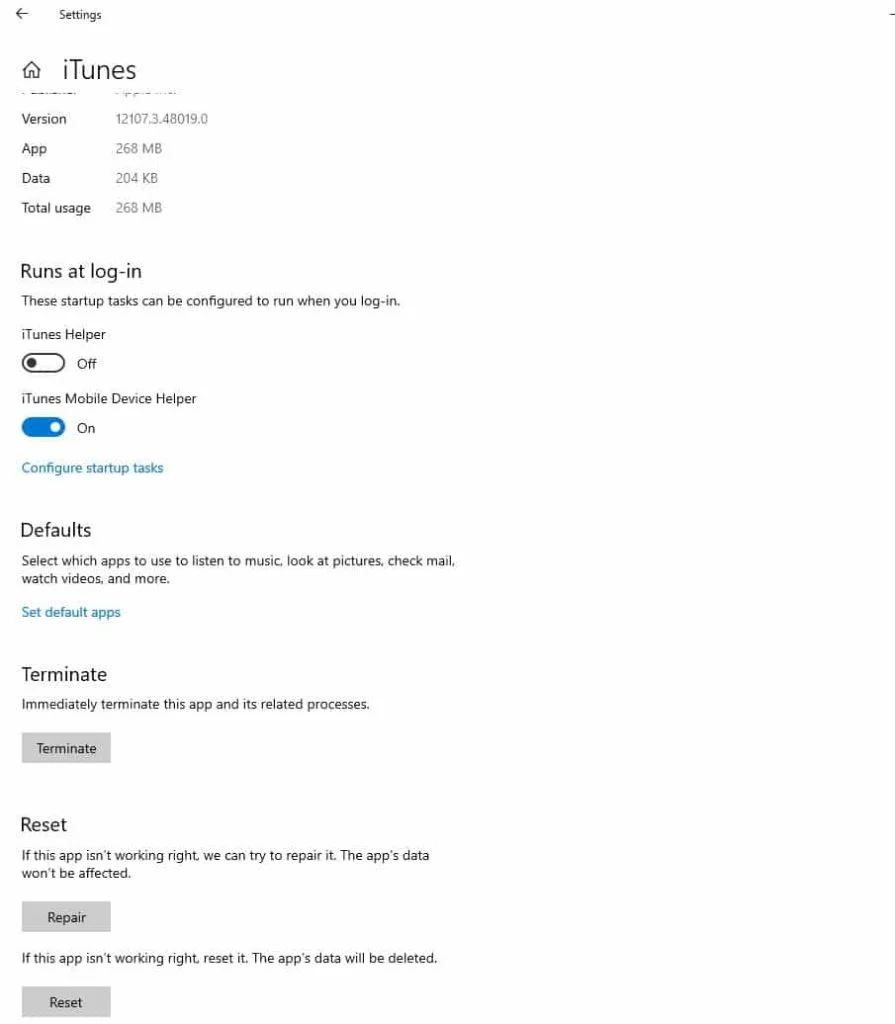
6. Reset the iTunes app on Windows 10 PC
If the iTunes app on your windows computer is installed through Microsoft Store, then you can reset the application to its default settings. Here are the quick steps.
- Go to settings using the keyboard shortcut Windows + I,
- Click Apps Menu,
- Search for iTunes and tap on advanced options,
- On the next screen, you get the option to reset and repair. Now click on Reset to get the default settings of the app.
7. Reinstall iTunes
Many people claim that replacing the current version of iTunes on their Windows PC often works in fixing iTunes troubles. So If you are still getting the error 0xe80000a in connecting after using all the methods given, then as the final resort you can try to reinstall your iTunes software. That should hopefully take care of any corrupted data or wrong settings that are causing the error to show up. For uninstalling iTunes from your Windows PC, Go to Settings>Apps.
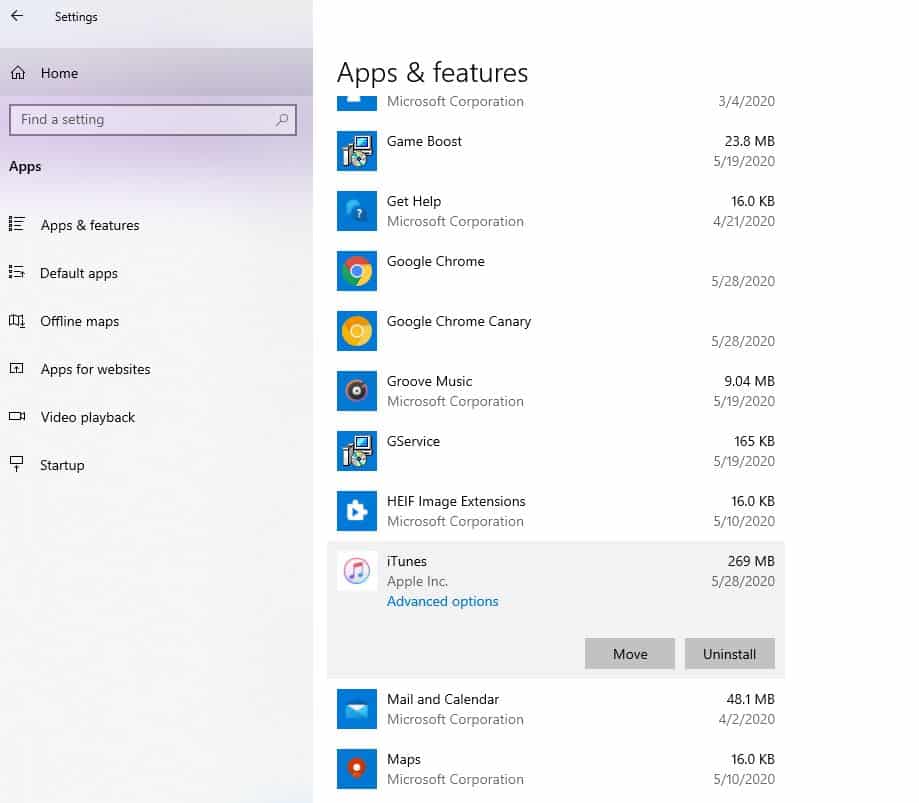
For uninstalling the iTunes app from your computer, Tap on the app and click on Uninstall then follow the process. However, make sure all iTunes-related programs in the following list are removed successfully
- iTunes
- Apple Software Update
- Apple Mobile Device Support
- Bonjour
- Apple Application Support 32-bit
- Apple Application Support 64-bit
Afterward, restart your Windows 10 computer, download a fresh copy of the iTunes App From Microsoft Store, and then reinstall it.
You can try multiple methods to fix this error, but updating your operating systems is the most common one so you should try it for sure as it is super easy. for your help here is a good video for your solution.
Also, Fix the Calendar error in iPhone.
Bottom Line
Hopefully, the iTunes error 0xE80000A code is no longer frustrating you, and you can now successfully connect your iPhone to iTunes. However, there’s simply no excuse for these weird issues to show up in the first place.
you can tell me if your problem is solved or not in the comment section.
Thanks for posting this article which has offered 7 tips to fix iPhone iTunes error that cannot connect to iPhone. My friends shared this to me who was wncountering this trouble. Though he told me that I could use professional iOS repair tools such as TunesKit iOS System Recovery, yet I prefer the methods discussed here.
can i fix this error 0xe80000a without update the itune app software because update the itune so i can nolonger to put my ringtone into the iphone
my iphone 11 is up to date also my window 10
#5 Reset Lockdown Folder – Thanks!